BMW Fog Lamp Removal Procedure
BMW fog lamp removal is a simple task that takes only a few minutes and a single tool. Removal may be required to change a bulb, replace a broken lens or perhaps install blank out plate in its place. This demonstration is done the E36 platform however most other cars from the era such as E38 and E39 are the same procedure. Earlier models like the E30 and E34 are different, these fog lamps are screwed in from the back side of the bumper.
Tools required:
- Phillips head screw driver
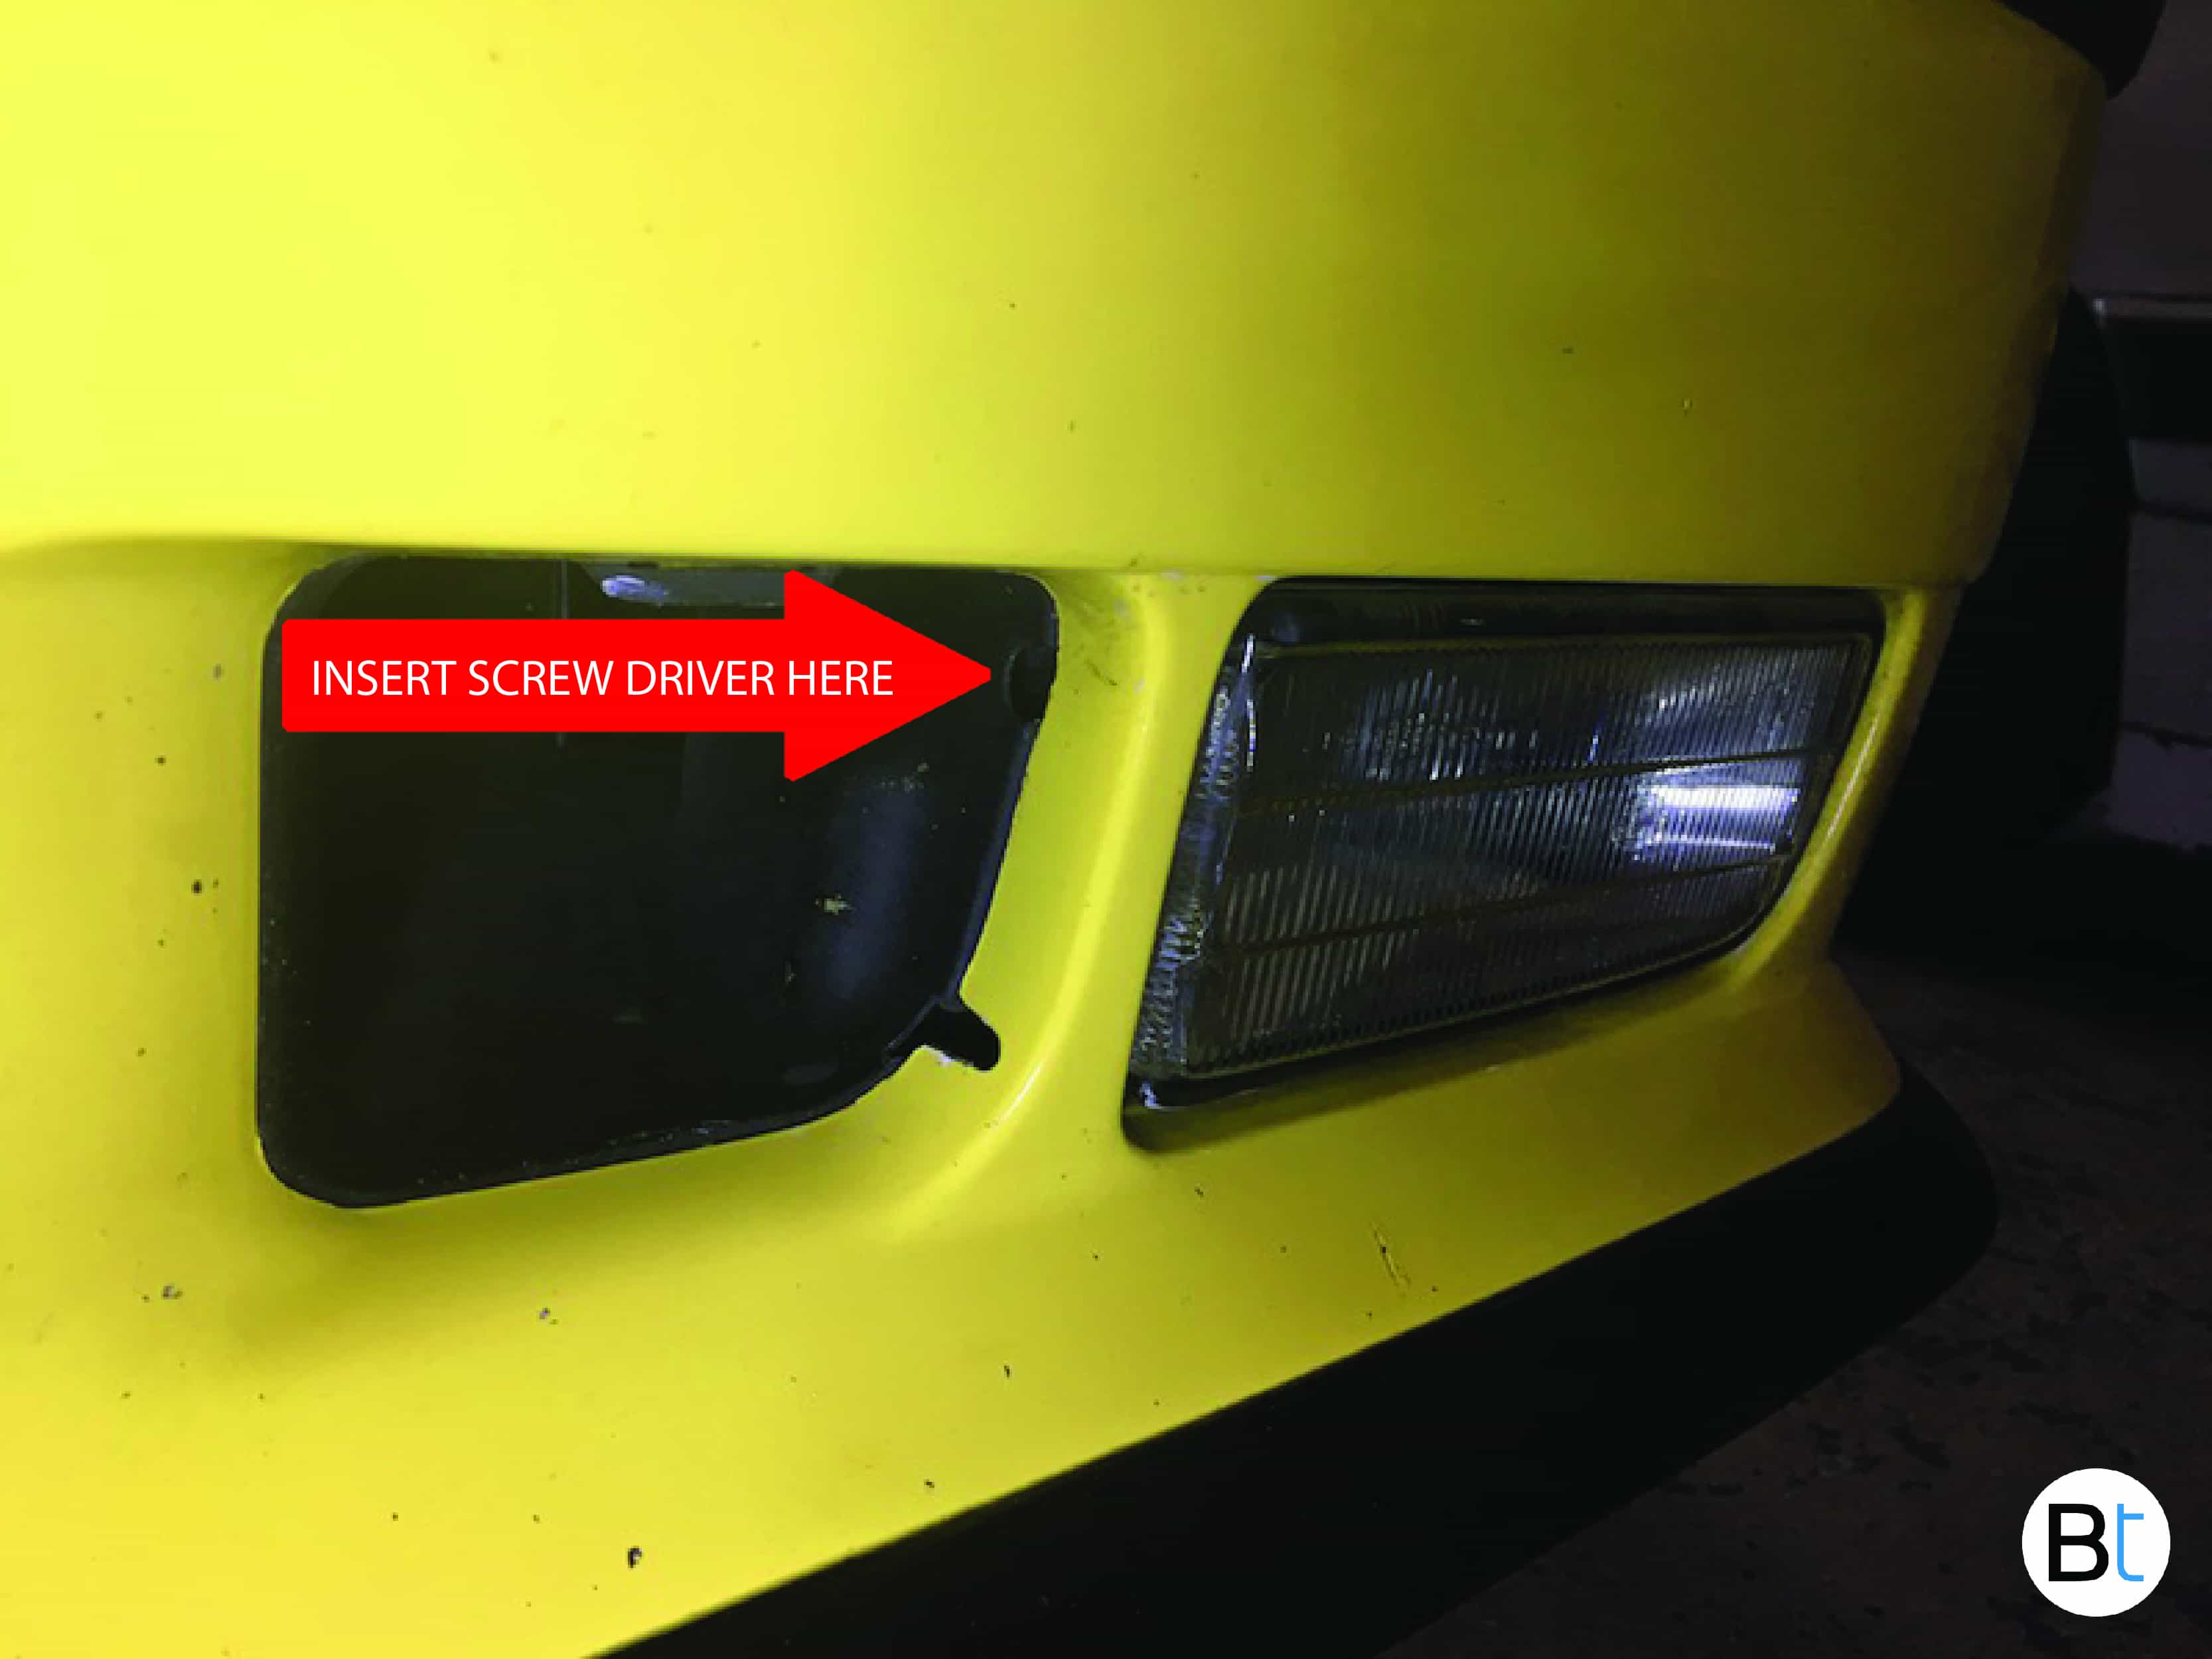
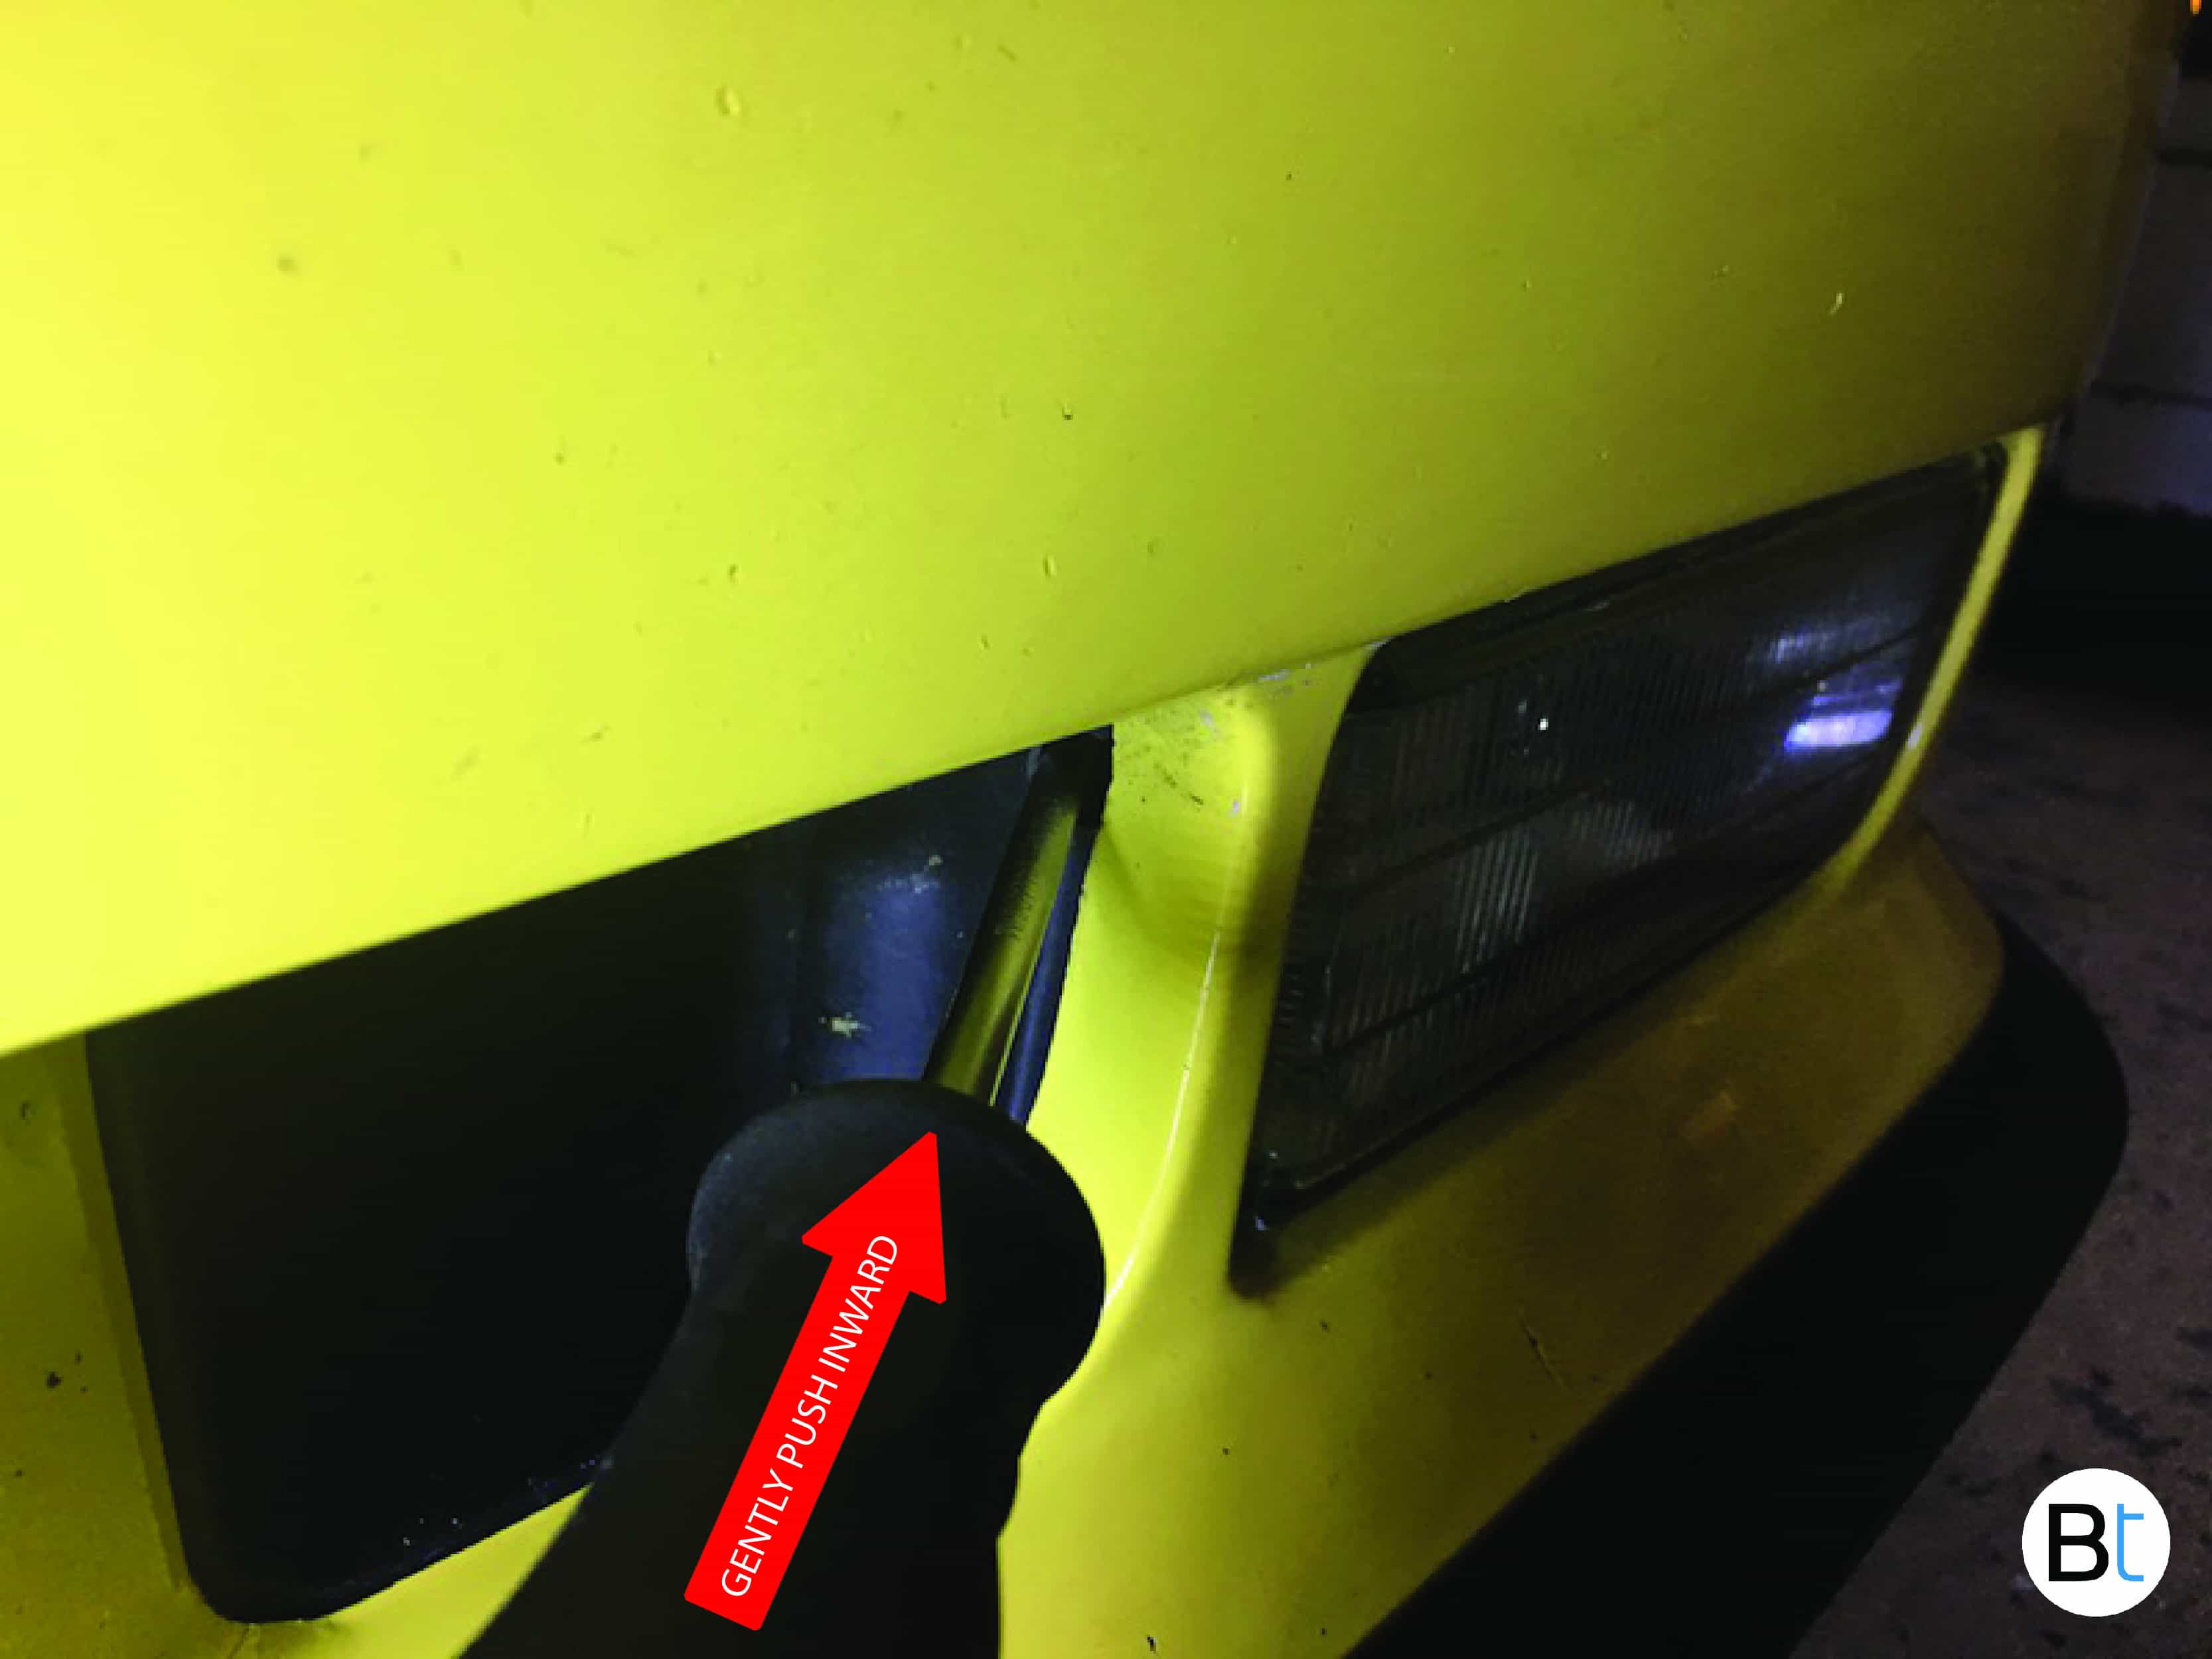
The only tool you need for the fog lamp removal is a phillips head screw driver. Start but locating the upper cutout on the inner side of the fog lamp as shown in the below attachment. This is where you want to insert the screw driver. Make sure as you insert the screw driver the handle is parallel to the ground. The goal is to push a plastic tab that will make the lamp pop out. Do not go into the opening with at an aggressive angle like you are stabbing at it.
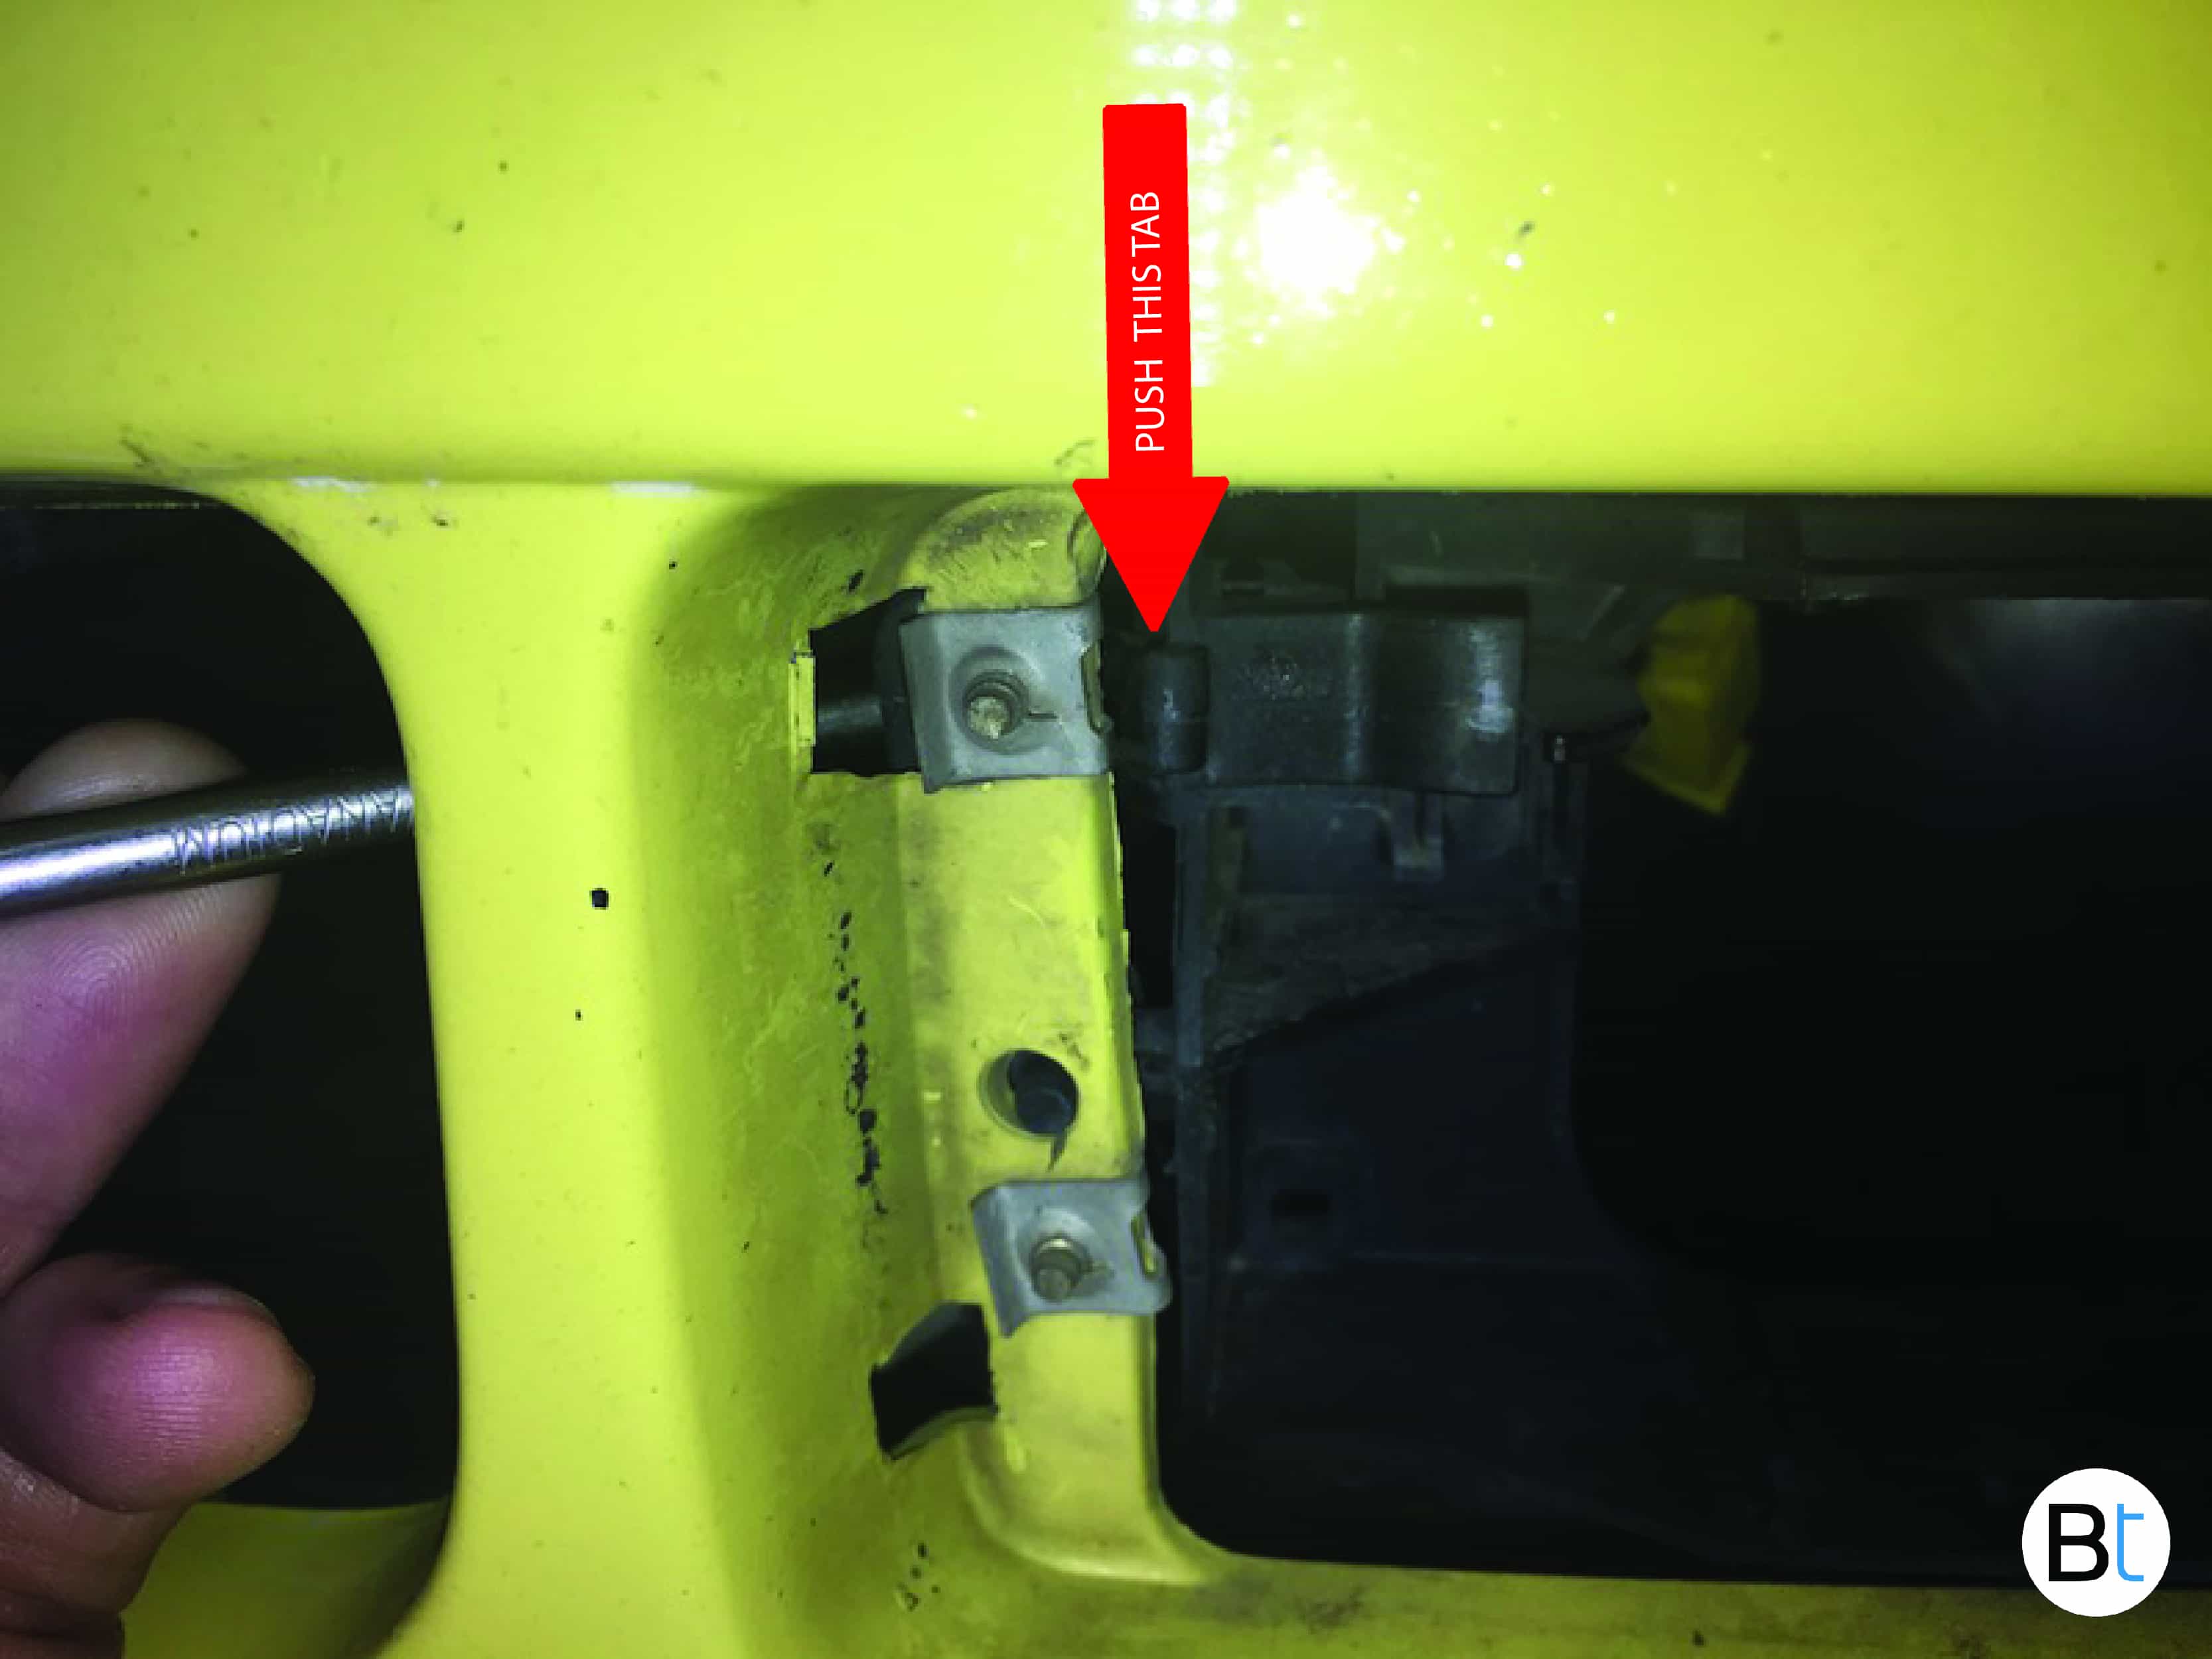
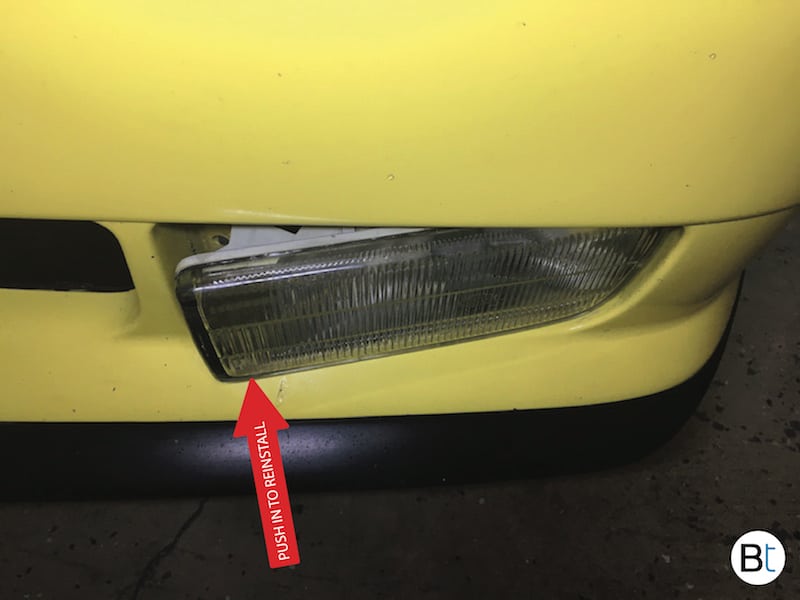
It may be difficult to find this plastic tab at first, but after a few attempts you will become successful. Look at the image below with the fog lamp already removed to get an idea of what the tab looks like. This will help to envision pushing it once the screw driver is inserted.
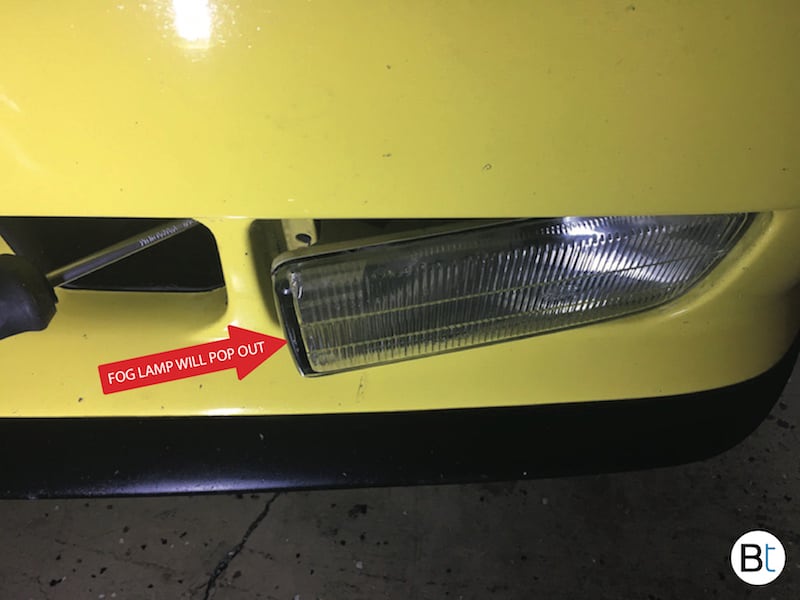
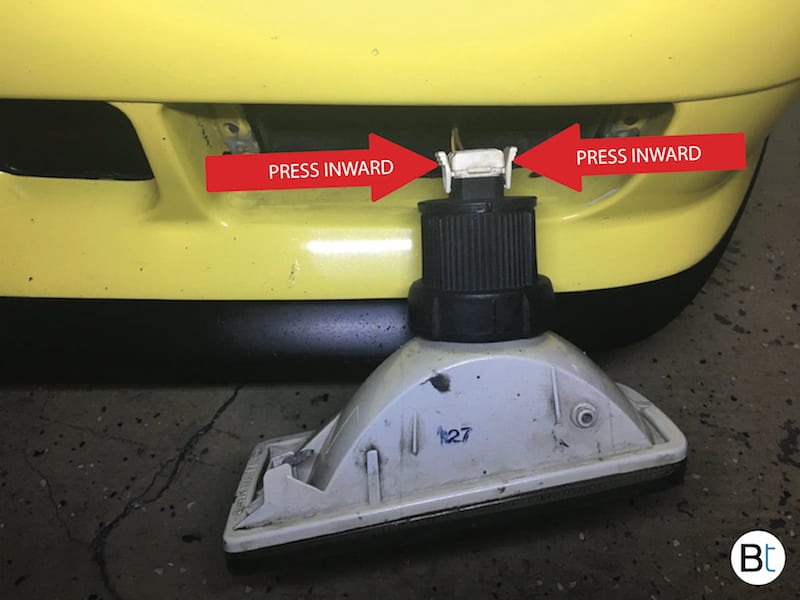
Once the fog lamp is popped out, grab it and gently pull it towards you. Unclip the fog lamp light harness with the clamps on the connector. Grab with your fingers, squeeze together and pull it out. Now the fog lamp is completely removed. To change a bulb, turn the back of the lamp housing counter clockwise.
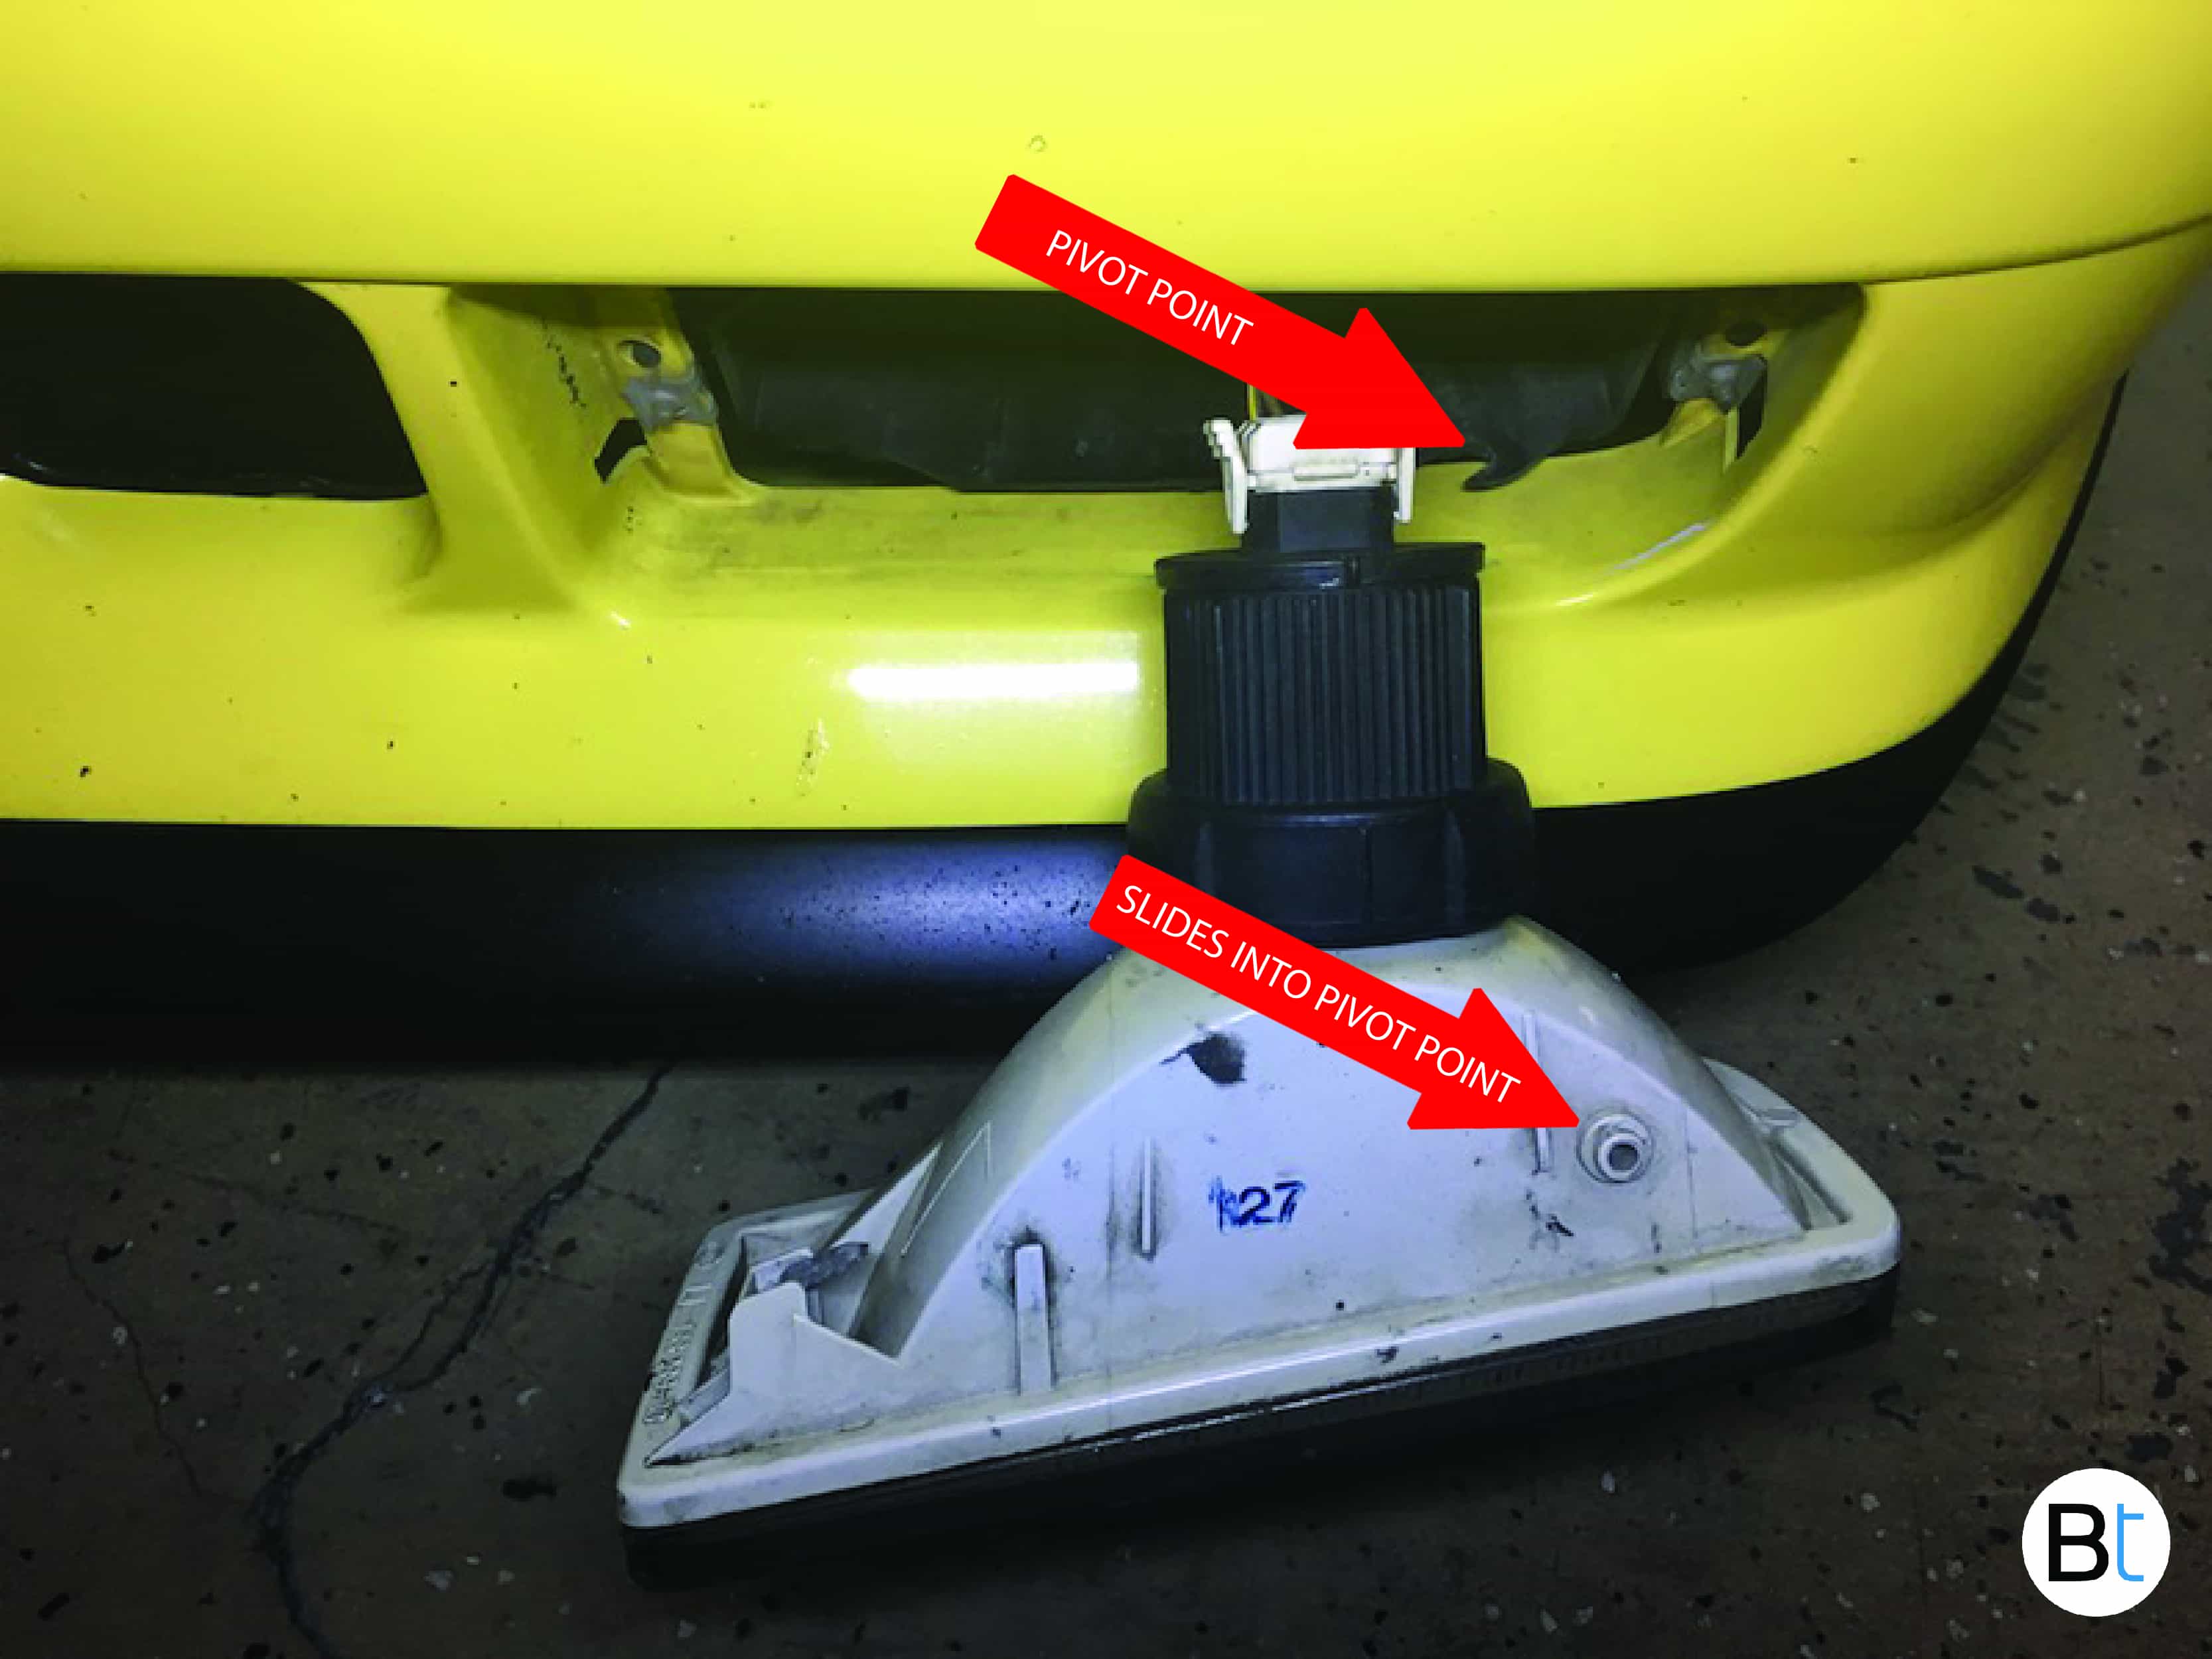
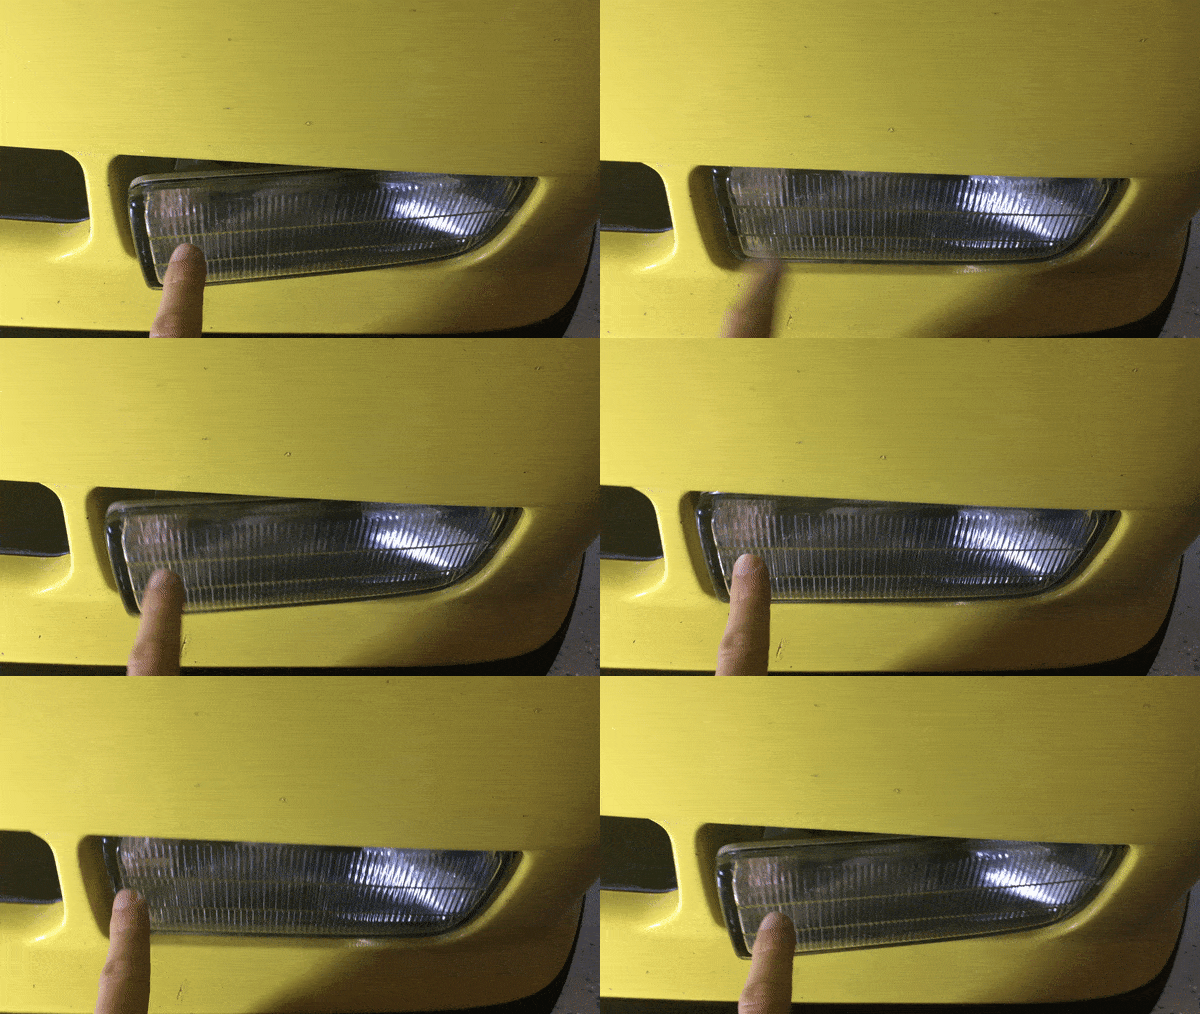
For lamp reinstallation notice the fog lamp housing has a two tabs on the upper and lower surface. These tabs pivot in the fog lamp notch. Insert the outer side of the fog lamp at an angle to engage the tabs into the notch. Next, swing the fog lamp towards the tab side. The lamp will simply snap into place. Make sure you feel a satisfying click to know it is locked in place and will not fall out when driving.


